If you want to make a cozy throw blanket that celebrates your love of cats, this crochet cat blanket pattern is perfect for you. It features adorable cat motifs worked into a soft, rectangular blanket that you can personalize with your favorite colors. Whether you’re a beginner or an experienced crocheter, this project gives you a handmade blanket that cat lovers will treasure.
Pattern Overview
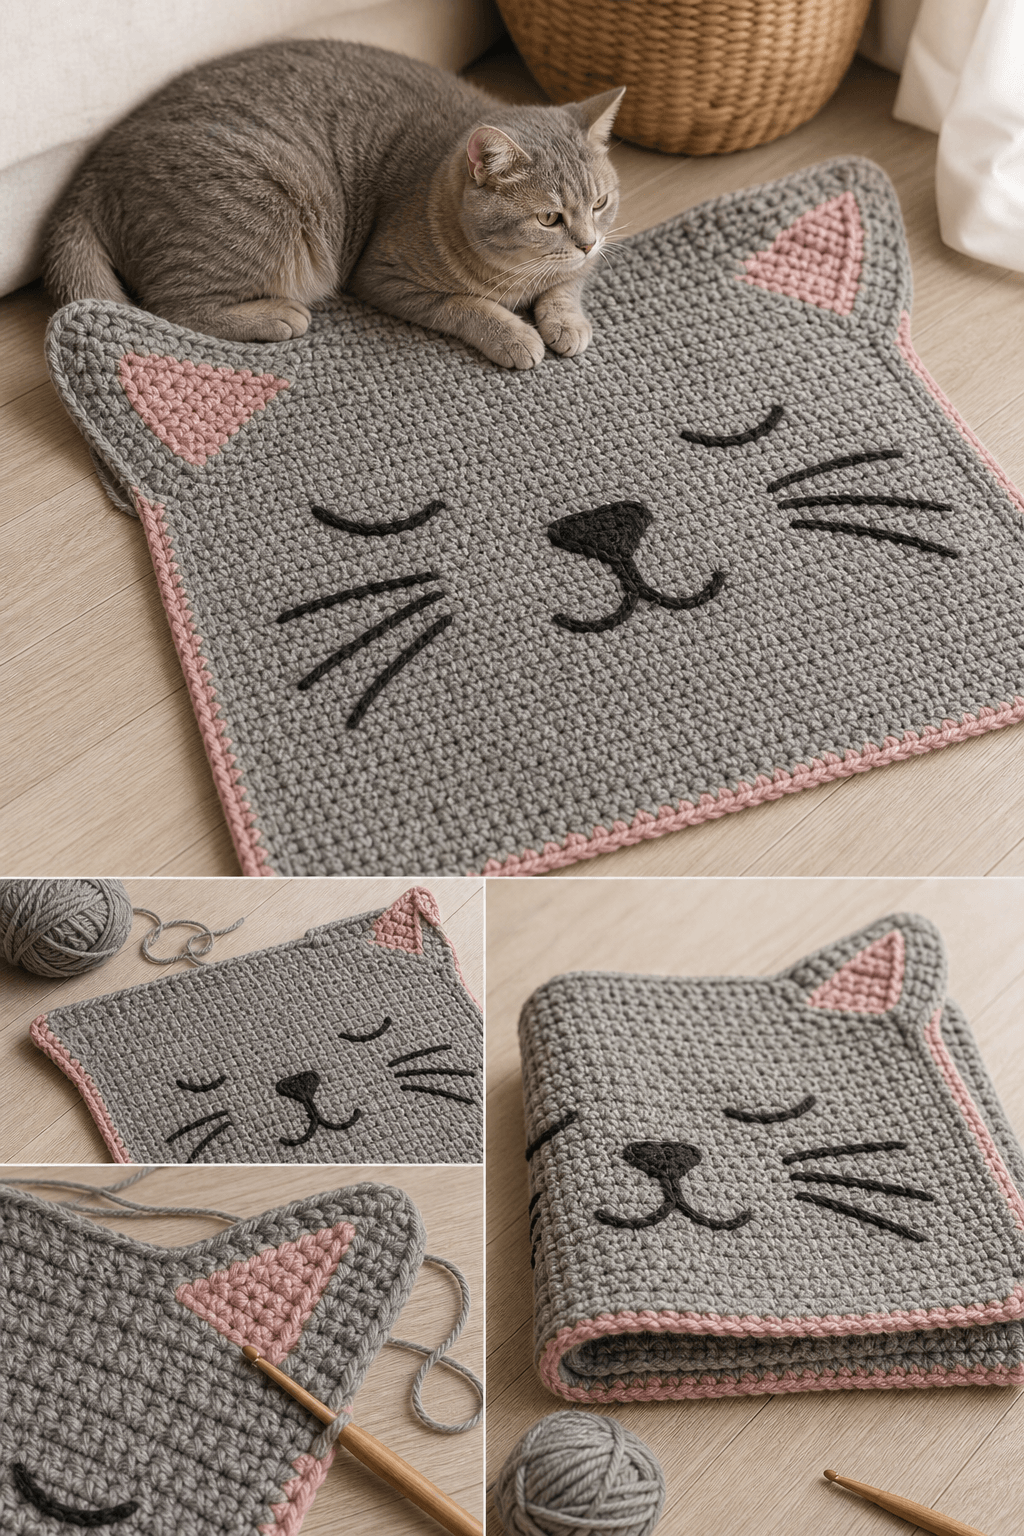
This crochet cat blanket pattern creates a rectangular throw blanket with four cat faces appliqued onto the main body. The blanket itself is made using simple single crochet and double crochet stitches, while the cat faces add personality and charm. The finished blanket is soft, snuggly, and perfect for draping over a couch or curling up with your own feline friend.
Skill Level
Easy to Intermediate. This pattern requires you to know basic stitches like single crochet, double crochet, and slip stitch. The cat faces are worked separately and sewn on, so no tricky colorwork or complex stitch sequences. If you’ve completed a few simple blankets or scarves before, you’re ready for this project.
Finished Size
The finished blanket measures approximately 40 inches wide by 48 inches long. This size works well as a throw or lap blanket. If you want a larger blanket, you can chain more stitches at the start and work more rows. If you prefer a smaller baby blanket, reduce the starting chain by 10-15 stitches and work fewer rows.
Materials
- Yarn: Worsted weight yarn in the following colors:
- Main color (cream, gray, or white): 1,200 yards
- Cat color (gray, brown, or black): 400 yards
- Pink (for nose details): 50 yards
- Black (for eyes): Small amount
- Hook: US H (5.0 mm) crochet hook
- Notions:
- Tapestry needle for weaving in ends and sewing
- Stitch marker
- Scissors
- Optional supplies:
- Embroidery floss or yarn in black for embroidered eyes instead of applique
Abbreviations
| Abbreviation | Meaning |
|---|---|
| ch | chain |
| sc | single crochet |
| dc | double crochet |
| sl st | slip stitch |
| st(s) | stitch(es) |
| rnd(s) | round(s) |
| row(s) | row(s) |
| BLO | back loop only |
| inc | increase |
| dec | decrease |
| sp | space |
Gauge
16 single crochet stitches and 14 rows of single crochet = 4 inches (10 cm) in single crochet with worsted weight yarn and a US H hook.
Gauge is important for this blanket because it determines your finished size. If your gauge is different, your blanket will be larger or smaller than the stated finished size. Take time to make a gauge swatch before you start, and adjust your hook size if needed.
Pattern Notes
- Work with the yarn held in a relaxed way to keep your stitches even and prevent your tension from becoming too tight.
- Use a stitch marker at the start of each row to help you count stitches.
- The cat faces are worked in rows and then sewn onto the main blanket body. You can applique them on or use embroidery for a simpler finish.
- If you’re uncomfortable sewing pieces together, try using a yarn needle and whip stitch to attach the cat faces securely.
- Weave in all ends as you go to make assembly easier at the end.
Crochet Pattern Instructions
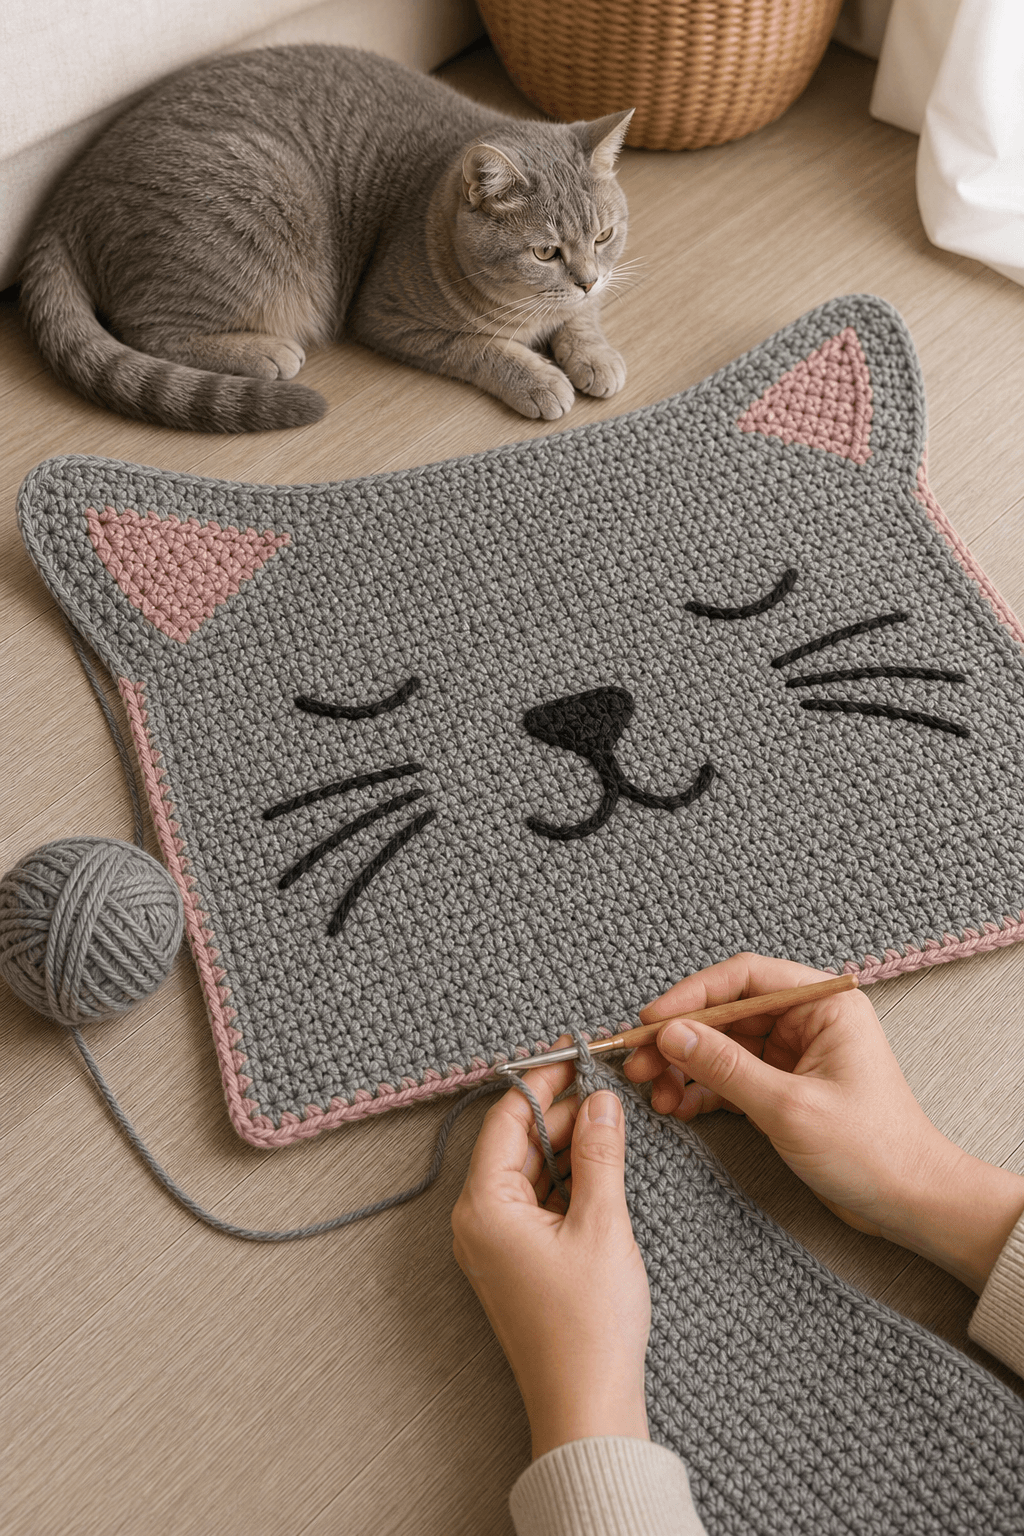
Main Blanket Body
With your main color yarn and US H hook:
- Ch 161.
- Row 1: Sc in the 2nd ch from hook and in each ch across. (160 sc)
- Row 2: Ch 1, turn. Sc in BLO of each st across. (160 sc)
- Rows 3-168: Ch 1, turn. Sc in BLO of each st across. (160 sc)
Your main blanket body is now complete and measures approximately 40 by 48 inches.
Cat Face (Make 4)
With your cat color yarn and US H hook:
- Ch 17.
- Row 1: Sc in the 2nd ch from hook and in each ch across. (16 sc)
- Rows 2-12: Ch 1, turn. Sc in BLO of each st across. (16 sc)
This creates a 4-inch by 3-inch rectangle. Fasten off, leaving a 6-inch tail for sewing.
Cat Ears (Make 8 Total, 2 per Cat Face)
With your cat color yarn:
- Ch 7.
- Row 1: Sc in the 2nd ch from hook and in each ch across. (6 sc)
- Row 2: Ch 1, turn. Sc2tog, sc in the next 2 sc, sc2tog. (4 sc)
- Row 3: Ch 1, turn. Sc2tog, sc2tog. (2 sc)
- Row 4: Ch 1, turn. Sc2tog. (1 sc)
Fasten off, leaving a 4-inch tail for sewing. Each ear is a small triangle.
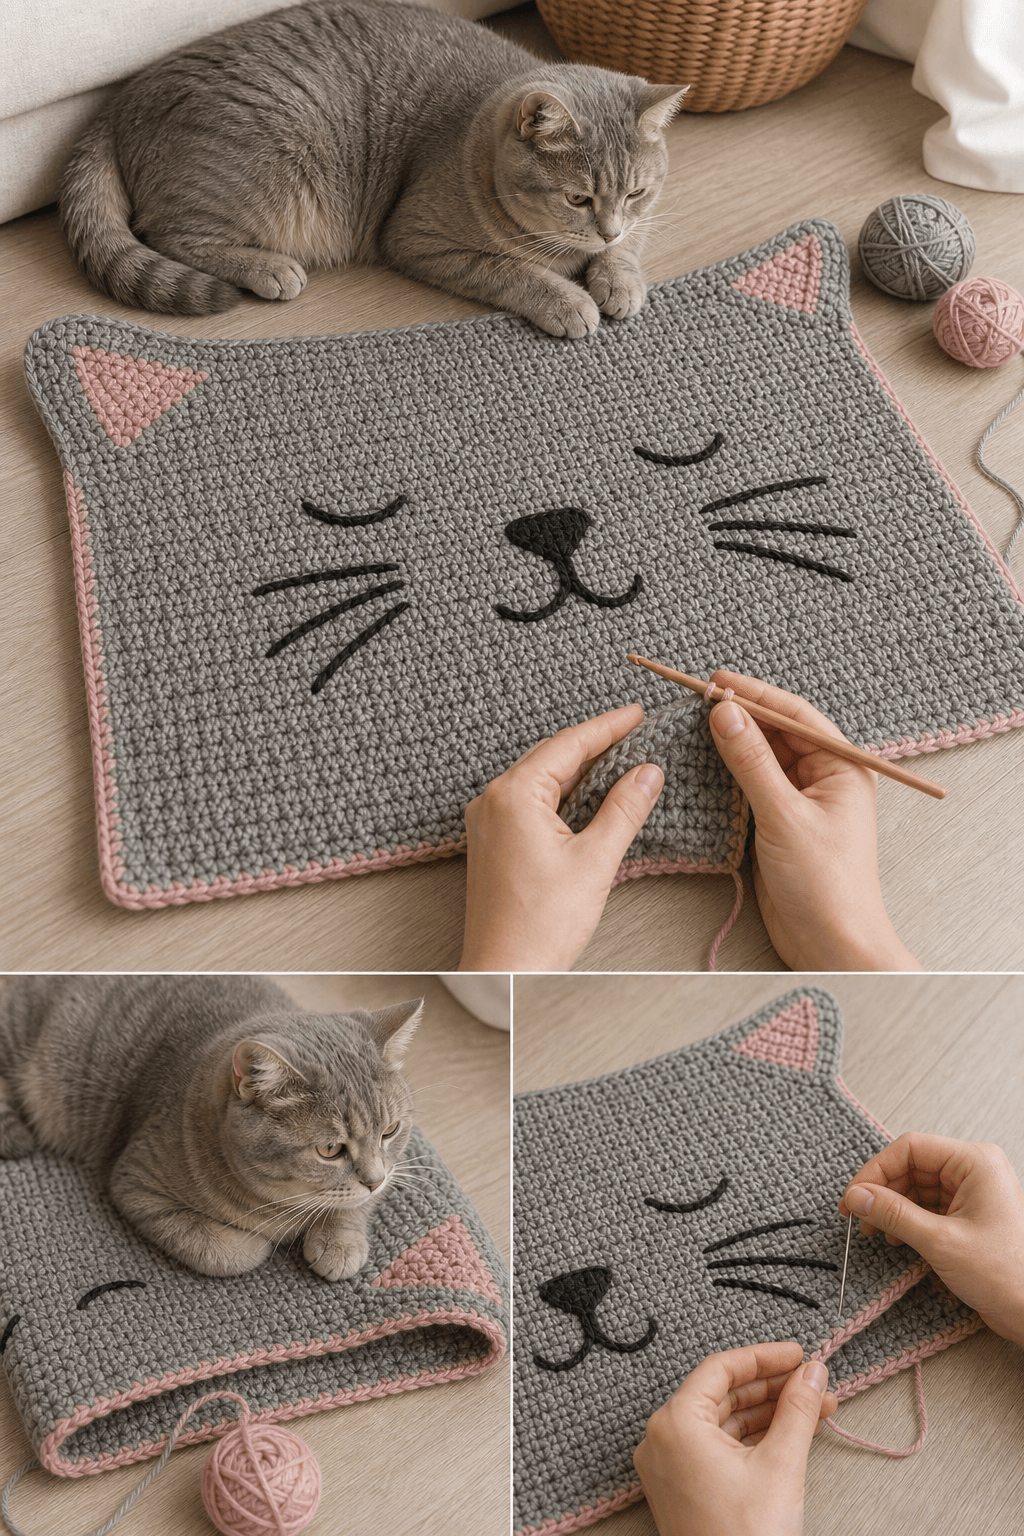
Eyes and Nose (Optional Embroidery)
If you prefer embroidery instead of applique:
– Use black embroidery floss to make two French knots for eyes on each cat face.
– Use pink floss to make a small triangle or dot for the nose.
If you prefer to applique pieces:
– Make two small circles from black yarn (or felt) for eyes and sew them on.
– Make a small triangle from pink yarn for the nose.
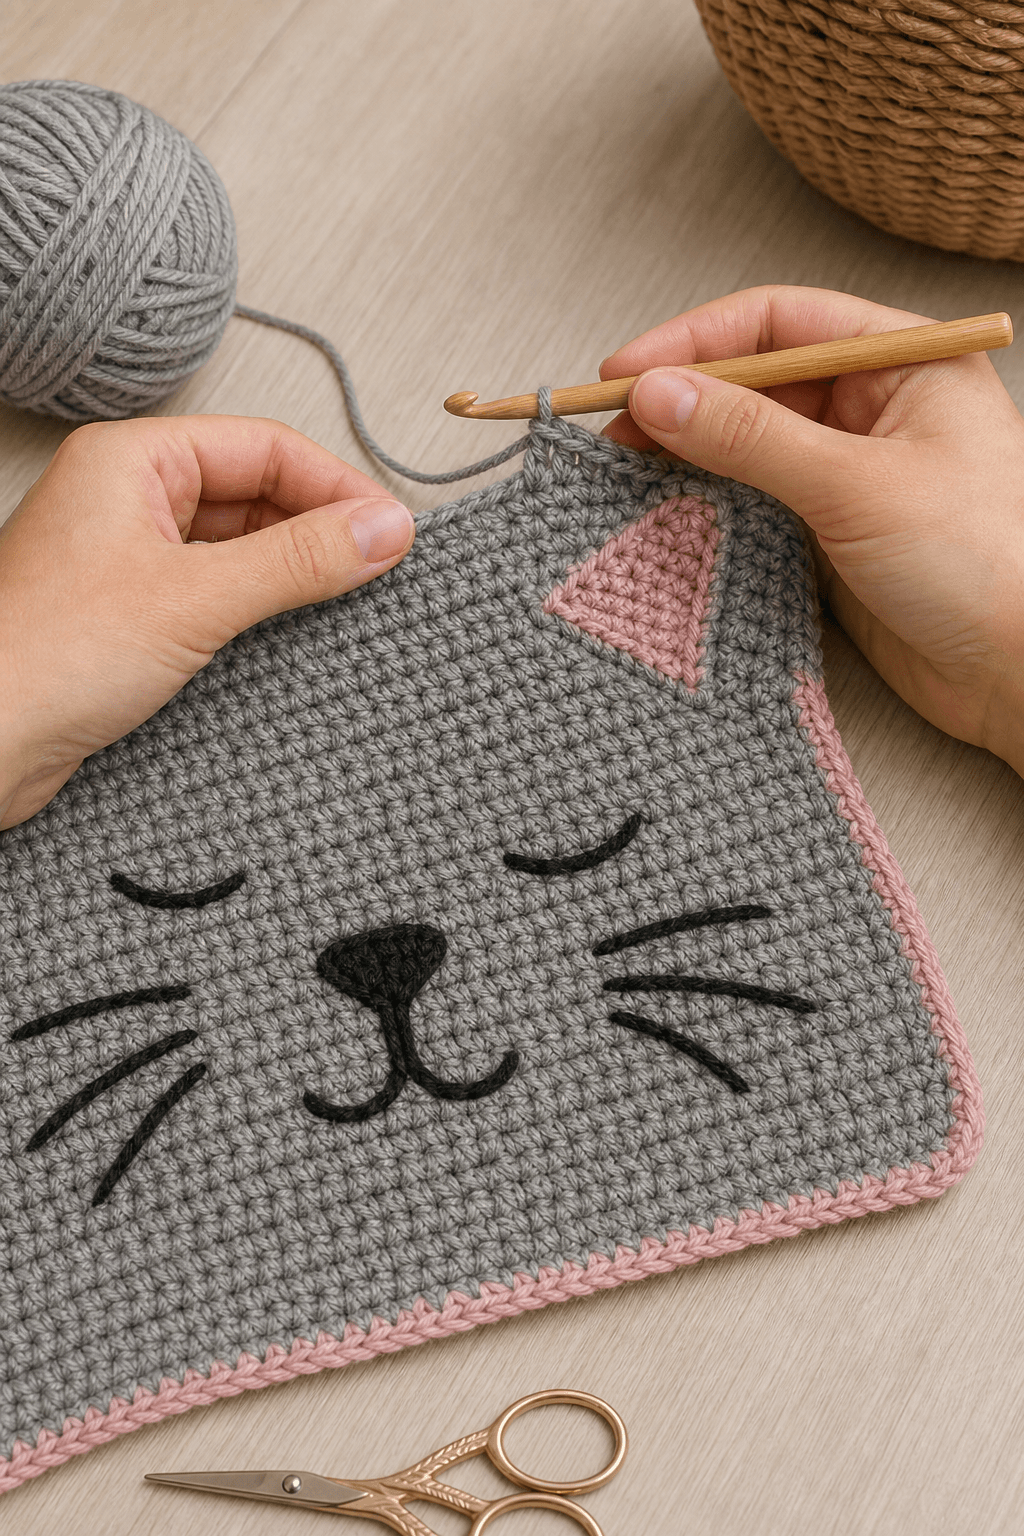
Assembly and Finishing
- Lay out your main blanket body flat on a clean surface.
- Position one cat face in each corner, leaving about 2 inches from the edge.
- Thread your tapestry needle with the yarn tail left on the first cat face.
- Use whip stitch or backstitch to sew the cat face securely to the blanket. Sew around all four edges of the cat face.
- Repeat for the remaining three cat faces.
- For each cat face, sew two ears to the top corners using the tails left on the ears.
- Add eyes and nose details using either embroidery or small applique pieces as chosen.
- Weave in all remaining yarn ends.
Customization Ideas
- Color variations: Try a white blanket with gray cats, or a pastel yellow blanket with orange cats. The cat color doesn’t have to match the main blanket color.
- More or fewer cats: Add cat faces to all four corners or create a pattern across the blanket with six or eight cats.
- Different yarn weights: Use bulky yarn for a thicker, faster blanket, or fingering weight yarn for a delicate, drapey version. Adjust your hook size to match the yarn weight and maintain proper gauge.
- Edging: Add a simple single crochet border or picot edging around the blanket edge for extra polish.
- Embellishments: Sew on small buttons for eyes, add embroidery details like whiskers with black floss, or use yarn pom-poms to create a fun, textured look.
- Size adjustments: For a baby blanket, start with 120 stitches and work 120 rows. For a larger bed throw, start with 200 stitches and work 240 rows.
Care Instructions
- Hand wash this blanket in cool water with a gentle detergent. Avoid hot water, which can cause colors to fade.
- Do not bleach.
- Gently squeeze out water. Do not wring or twist the blanket.
- Lay flat to dry on a clean surface, or hang to dry away from direct sunlight.
- Once dry, you can lightly block the blanket to even out the edges if needed.
- Store the blanket in a clean, dry place away from pets to prevent snagging.
Troubleshooting
Uneven edges: If your edges are wavy or uneven, check your tension. Pulling too tightly will make edges curl. Try loosening your grip slightly and keeping consistent tension throughout each row.
Holes or gaps between stitches: Make sure you’re putting your hook through the correct loop. Work in the back loop only (BLO) as stated in the pattern to create a consistent texture.
Cat faces are too small or too large: If your finished cat faces don’t fit well on the blanket, adjust your hook size. A larger hook creates bigger stitches and larger cat faces. A smaller hook creates tighter stitches and smaller cat faces.
Difficulty sewing pieces together: Use a tapestry needle with a blunt tip to prevent splitting your yarn. A whip stitch works better than a backstitch for applique work. Take small, even stitches and sew close to the edge of the piece you’re attaching.
Blanket is curling at the edges: This happens when your tension is too tight. Loosen your grip on the yarn and try again on the next blanket. You can also add a simple single crochet border around all edges to flatten and frame the blanket.
Making a crochet cat blanket pattern is a rewarding way to create a personalized gift or keep for yourself. The simple stitches mean you can relax and enjoy the process, while the cat faces add charm and personality. Once you finish, you’ll have a cozy, handmade blanket that any cat lover will adore.